Knafeh Tart
I have been living in Jaffa for the last couple of weeks. To be honest, I don’t miss Jerusalem yet. In two-three weeks I’ll have to go back there anyway. Back to a renovated and improved pharmacy. In the meantime, I can enjoy the beauty of Jaffa at nights, during daylight and in rainy weather.
They didn’t use to sell knafeh here when I was growing up. Now they sell it on every corner. So, I decided to try out two corners. I wasn’t impressed that much. Nabulsi knafeh is still the best.
However, despite my respect for it, this Jaffa boy wants to make knafeh as well. Maybe not like the original this time, or not even close to it, but knafeh with a little twist of my own. I disassembled the knafeh into its parts and reassembled it to get something new, all the while sticking to the basic rules.
My version is still crunchy like the original, has cheese like the original, golden with a little touch of pistachio. Well, in my case, that touch is a blow, but that shouldn’t surprise anyone.
Looks familiar, right? Well, I paired between two favorite blogposts and got the perfect date. One is a cheese mousse entremet with kadaif and pistachio, the other an infinite pistachio tartlet. A mash-up between east and west, or more precisely – when the Middle East met Paris.
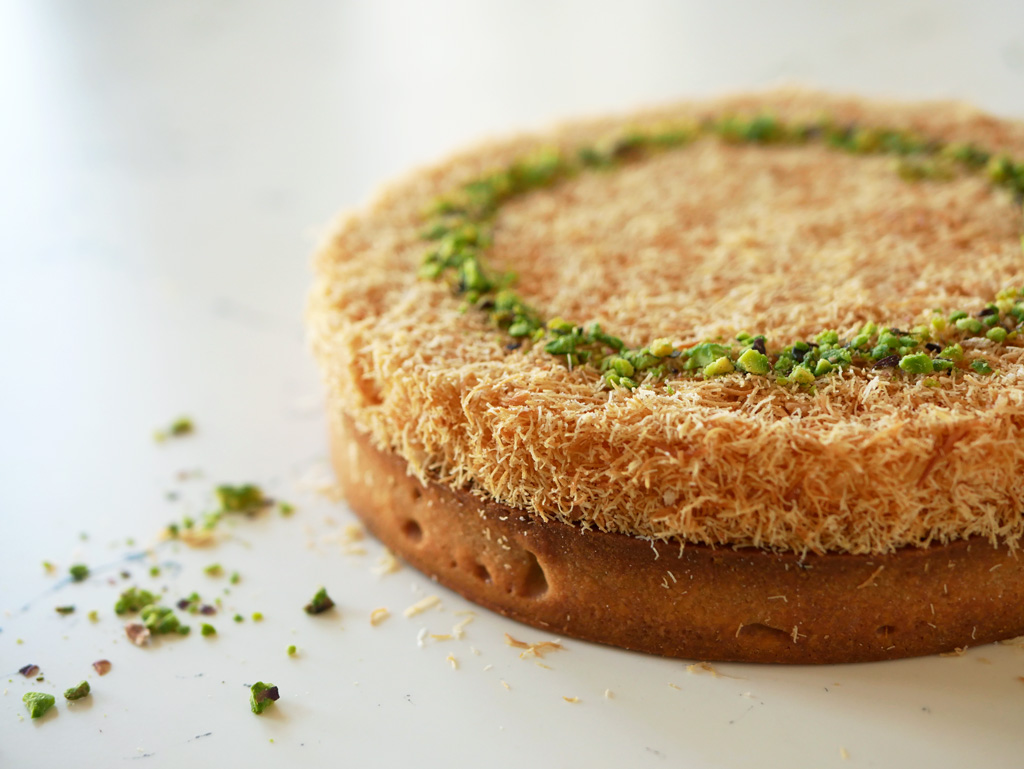
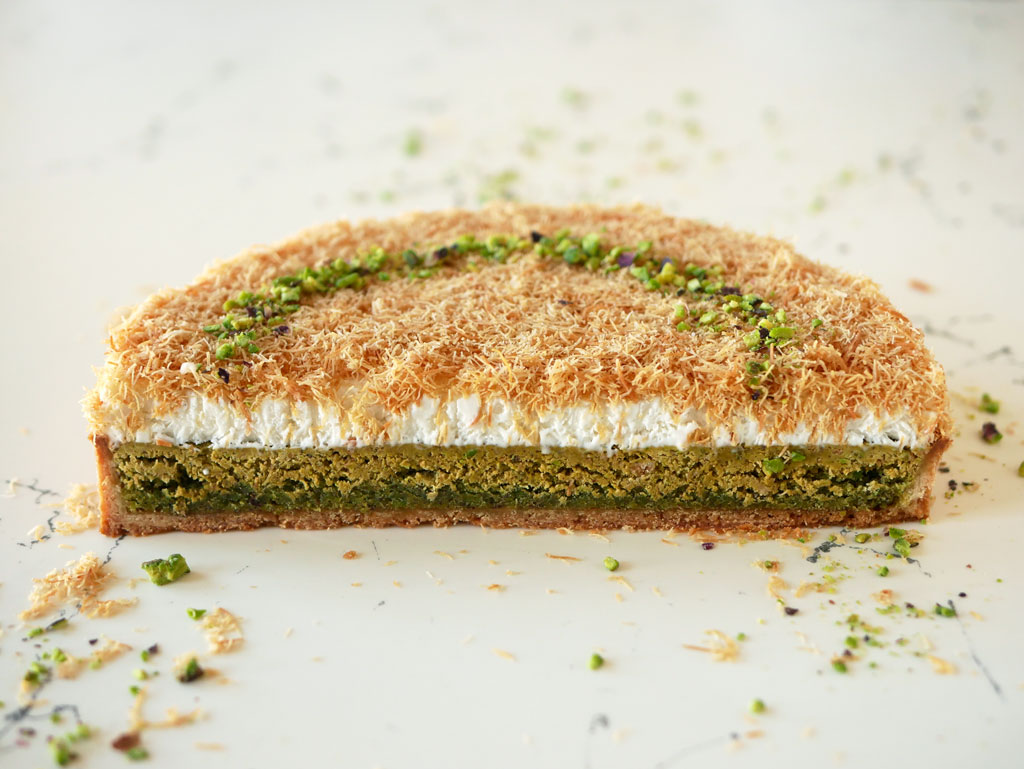
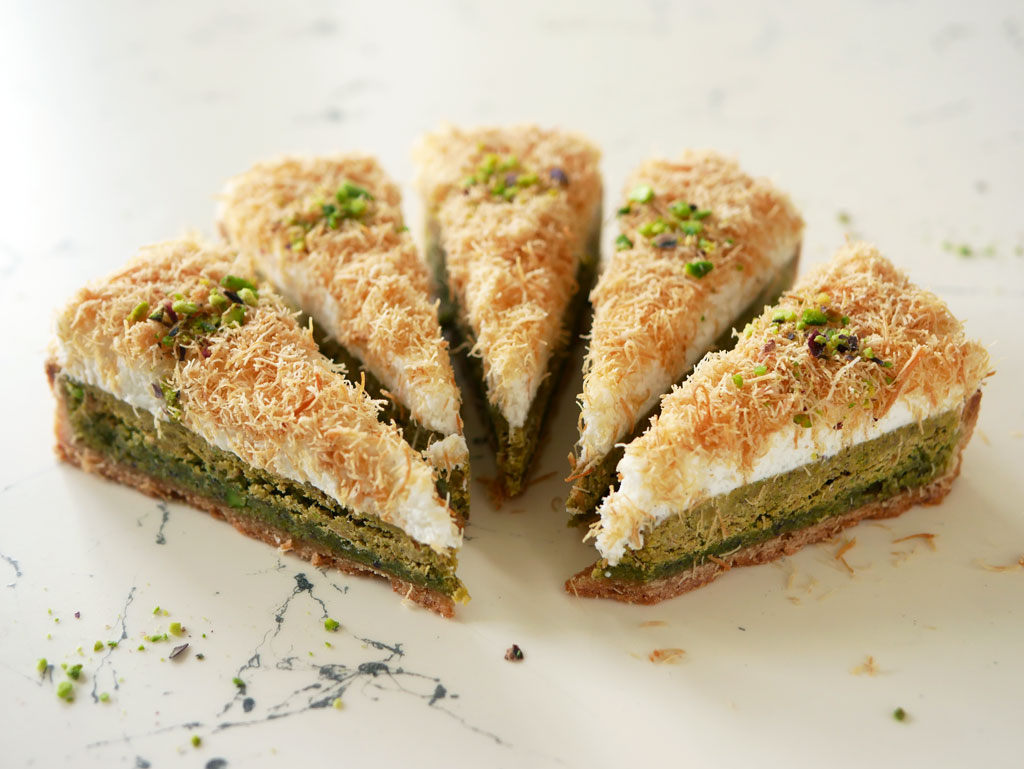
So, what is it? It’s a knafeh tart of course, with baked pistachio cream and a crunchy pistachio kadaif layer that sits under a cream cheese mousse decorated with golden kadaif noodles.
Same notes from a week ago
* In this knafeh tart recipe, I use natural pistachio butter. You can probably find it in most nature stores. Pistachio butter is made from 100% pistachios, with no added oil, and doesn’t taste bitter at all.
* It’s important to make the dough in a cold environment (the ingredients should be cold as well). Make sure that the kitchen is cold throughout the process. If the dough softens while working with it, put it in the fridge for a short rest.
* In this recipe I use a Silpan to improve the baking of the crust. If you don’t have one, blind bake the crust and use pie weights, just like I did in this post.
Ingredients
Gelatin mass *
3 g gelatin powder
15 g water
Cream cheese mousse
120 g cream cheese 9% (about 160 g before straining)
40 g sugar
20 g heavy cream 38%
½ tsp vanilla paste
14 g gelatin mass
70 g heavy cream 38%
Vanilla crust
235 g all-purpose flour
30 g almond powder
90 g powdered sugar
½ tsp salt
120 g cold butter (cut into cubes)
56 g eggs (1 large egg)
1 tsp vanilla paste
Baked pistachio cream
55 g powdered sugar
56 g shelled pistachios
55 g soft butter (at room temperature)
56 g eggs (1 large egg at room temperature)
Roasted kadaif
150 g kadaif noodles
15 g powdered sugar
30 g butter
Pistachio streusel
30 g shelled pistachios
15 g all-purpose flour
15 g demerara sugar
¼ tsp salt
15 g butter
Pistachio kadaif crunch
55 g natural pistachio butter
50 g roasted kadaif
60 g pistachio streusel
55 g white chocolate
Decoration
80 g roasted kadaif
About 20 g shelled pistachios, coarsely chopped (preferably roasted as well, but not necessary)
Equipment
Round baking ring, 20 cm diameter & 2.5 cm height
Round baking ring, 18 cm diameter
Thermometer
Measuring pitcher
Mesh sieve
Hand blender
* The amount of gelatin is too small to weigh? You can make a bigger batch, let’s say 10 g gelatin powder and 50 g water and just weigh 14 g from the final mass to the recipe.
Knafeh Tart
Advance Prep
Cheese straining: Place a strainer on top of a bowl. Put the cheese in the strainer and store in the fridge for about 2 hours. In this process, most of the liquid will be separated from the cheese.
Gelatin mass: Sprinkle gelatin powder over the water, mix well and keep in the fridge for at least half an hour. If the resulting texture is too spongy or lumpy, heat the gelatin mass gently just to melt it and put it back in the fridge to set again. Cut into small pieces before use.
Cream cheese mousse
Prepare the smaller ring: warm the ring a little on low heat. Cover the bottom of the ring with plastic wrap by pulling and attaching it to the sides to form a flat sealed bottom. Place the ring on a flat tray.
Whip 70 g cold heavy cream (with a whisk or a hand mixer) until you almost get soft peaks (beware not to over whip, the goal is to get a texture that resembles yogurt). Keep in the fridge.
Place the filtered cheese in a bowl. Add vanilla and sugar. Mix until uniform. Put 20 g heavy cream in a pot and bring to a boil. Remove from heat, add gelatin mass and mix until completely dissolved.
Pour into the bowl containing the cheese mixture. Using a whisk, mix well until you get a uniform and smooth consistency. From this stage, you have to work fast.
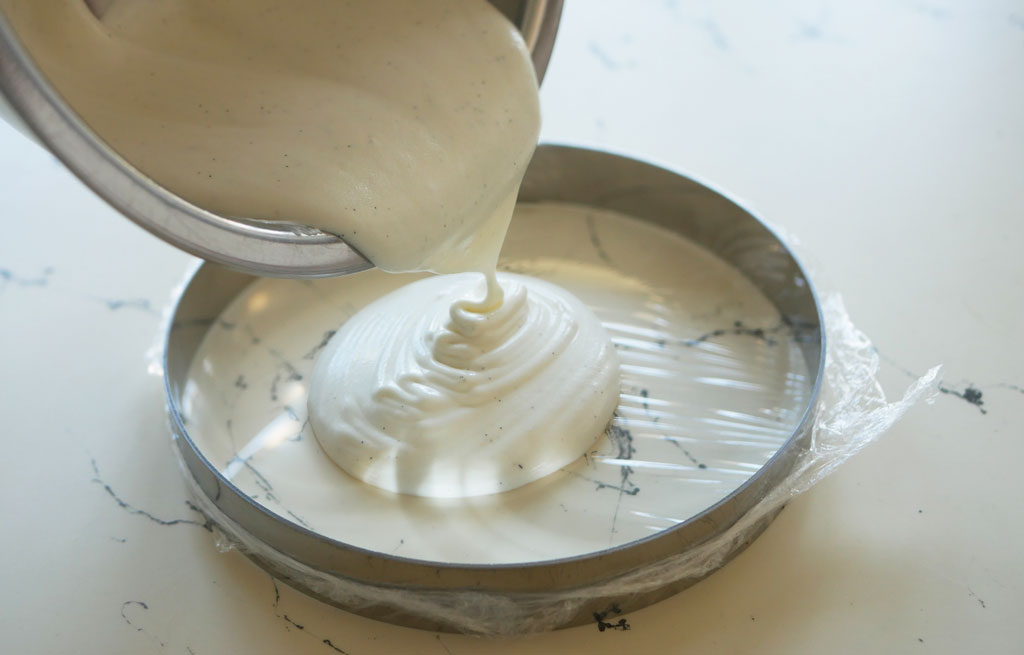
Remove the whipped cream from the fridge, whip it a little bit and then fold it into the cheese mixture in 3 parts until the mixture is uniform. Pour immediately into the ring. Give it a little shake to flatten the mousse.
Keep in the freezer for at least 2 hours or until it has set enough to be released easily from the ring.
Crust
Put flour, almond powder, powdered sugar, salt and butter cubes in the mixer bowl and keep in the fridge for about 10 minutes. Remove from fridge.
Using the paddle attachment, start mixing at low-medium speed until the batter reaches sand-like consistency. Make sure the butter chunks are as small as possible at the end of the process without melting the butter. Make sure the room is chilled.
Using a fork, whisk the egg yolk with the vanilla. Add the egg mixture all at once and keep mixing at medium speed until the dough starts to form but is not yet completely uniform. Remove dough parts from the bowl and combine.
Divide the dough in two equal parts – one part to be used for this recipe and the second part to be kept for another use (up to a week in the fridge or 2-3 months in the freezer).
Place the dough on top of a parchment paper. Flatten the dough a little bit and lay another parchment paper on top. Roll out the dough with a rolling pin between the two parchment papers to 3 mm thickness. Keep turning the dough throughout. Place the dough with the parchment papers on a tray. Keep in the fridge for at least an hour or two.
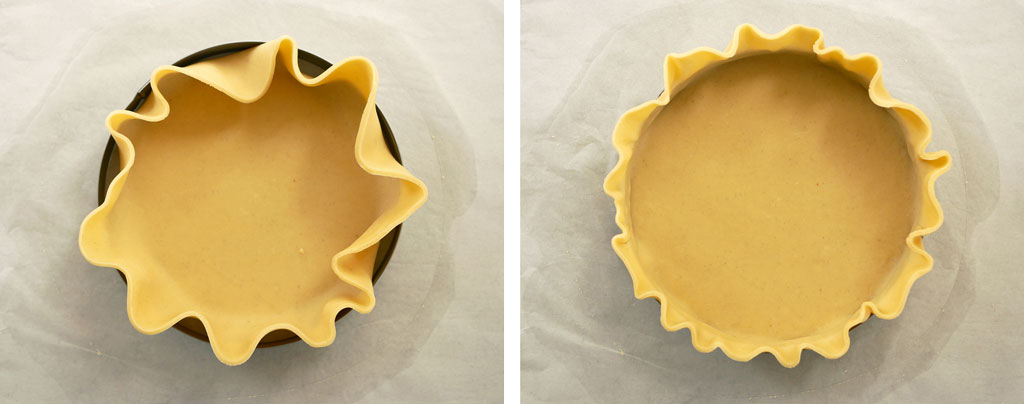
Fonçage:
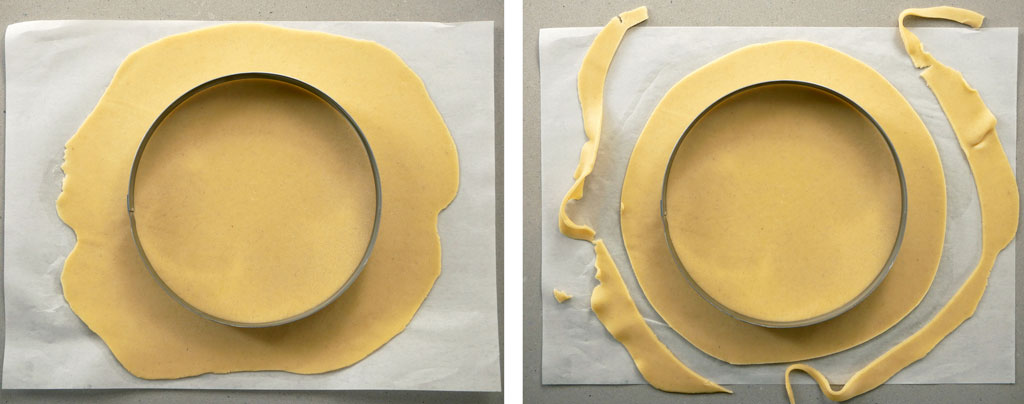
Lightly butter the inner side of the larger baking ring so that the dough sticks to it. When the dough is ready, peel parchment papers from both sides. Place the ring gently on top of the dough and cut a larger circle around the ring.
Please note (!) If at any point the dough starts to soften, put it back in the fridge until it is slightly stiff again.
Place the ring on a parchment paper and place the dough gently on top of it. Lift the edges of the dough, gently push the rest of the dough down and attach the edges to the sides of the ring, starting from the bottom of the ring to the top. Gently press down on the sides so that the corners at the bottom form a right angle. (It’s not the end of the world if the dough gets torn accidentally. Just attach the sides that have been torn apart and move on).
Before you move on to the next step, check that the bottom is straight and uniform from the lower side of the ring (if the dough is cold enough, you will be able to flip and check it easily. If the dough is too soft, put it back in the fridge till it’s set again).
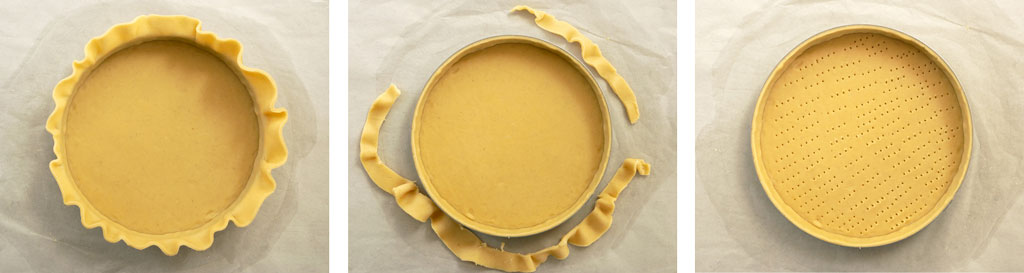
Go over the top of the ring with a sharp knife and remove the excess dough. Prick the bottom of the crust all over with a fork and keep in the freezer until the dough is stiff again (about half an hour).
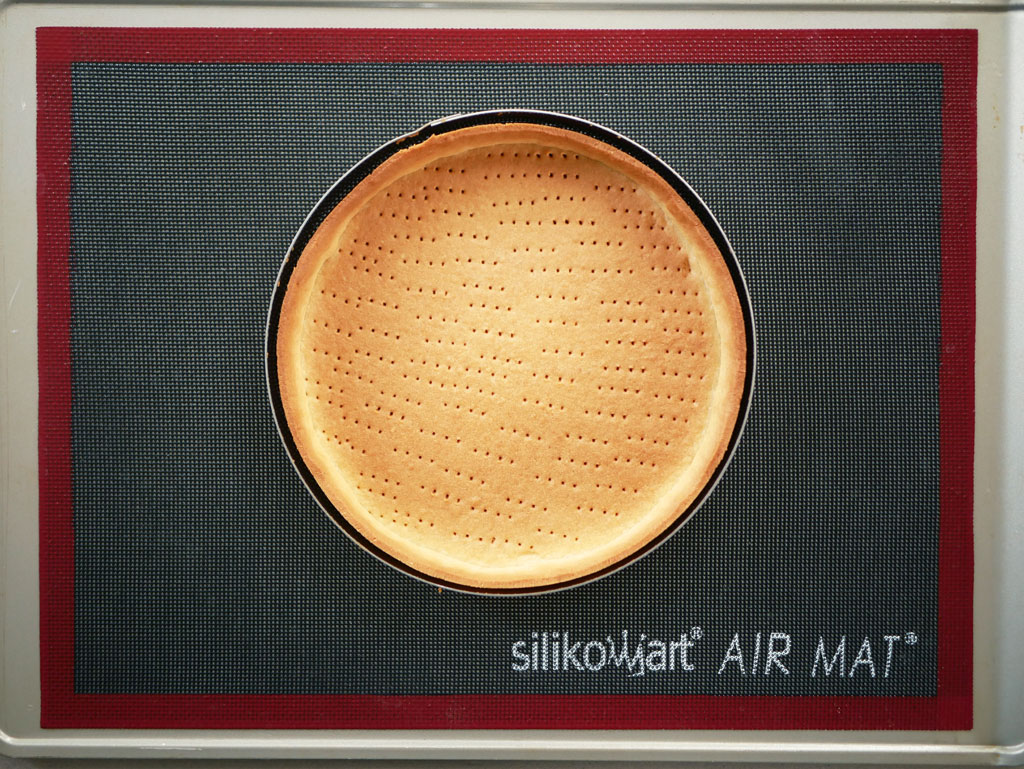
Baking:
Preheat oven to 170 °C (340 °F). When the desired temperature is reached, remove the crust from the freezer and set it on a Silpan (if you don’t have one, blind bake the crust and use pie weights, just like I did in this post).
Place immediately in the oven and bake for about 18-20 minutes, until the crust begins to brown. Set aside to cool.
Release the crust from the ring. Brush the top of the crust against a flat mesh sieve to straighten the edges and give it a cleaner, sharper look. Clean the crumbs from inside the crust using a clean brush. Set aside.

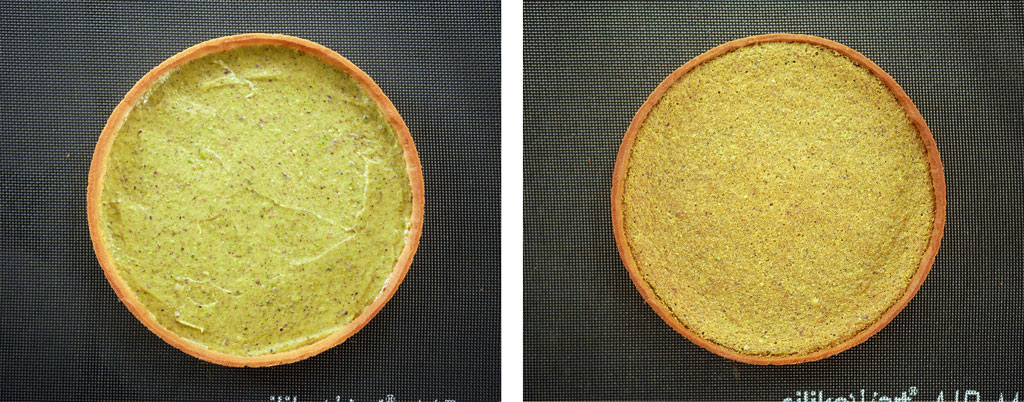
Baked pistachio cream
Preheat oven to 170 °C (340 °F). Put pistachios and powdered sugar in a small food processor and ground to a fine powder. Transfer to the mixer bowl and add soft butter. Attach the paddle attachment and mix on low-medium speed until you get a uniform mixture.
Add the egg gradually to the butter mixture and keep mixing. Scrape the sides of the bowl occasionally. Keep mixing until you get a uniform cream. Transfer the cream into the crust.
Using a small offset spatula, spread the cream evenly inside the crust and flatten the surface. Put the crust back in the oven. Bake for about 16-20 minutes, until the cream is set and starts separating from the rim of the crust. Remove from the oven and set aside to cool.
Roasted kadaif
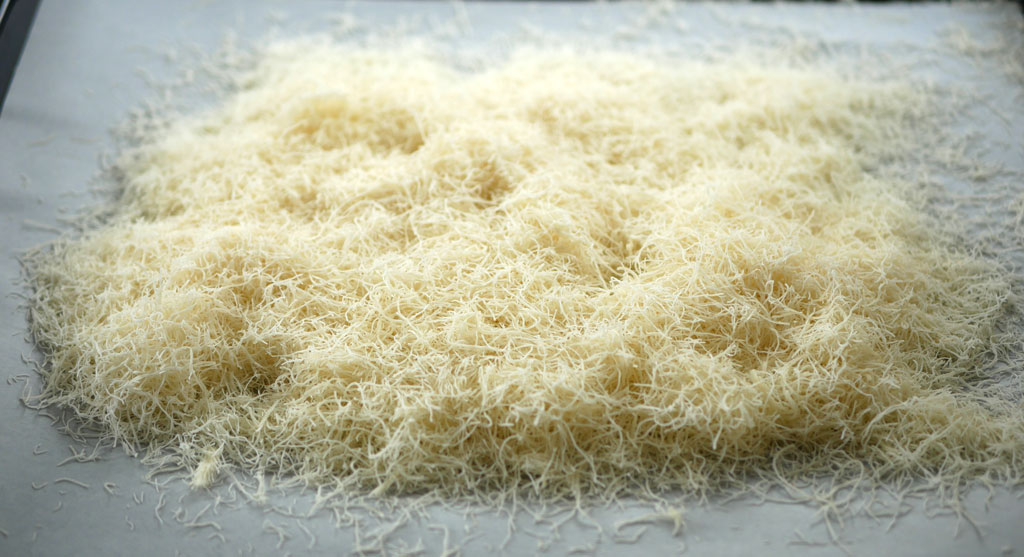
Preheat oven to 180 °C (355 °F). Chop the kadaif noodles with a sharp knife, scissors or with your hands only. Spread them in a thin layer on top of a baking tray lined with parchment paper.
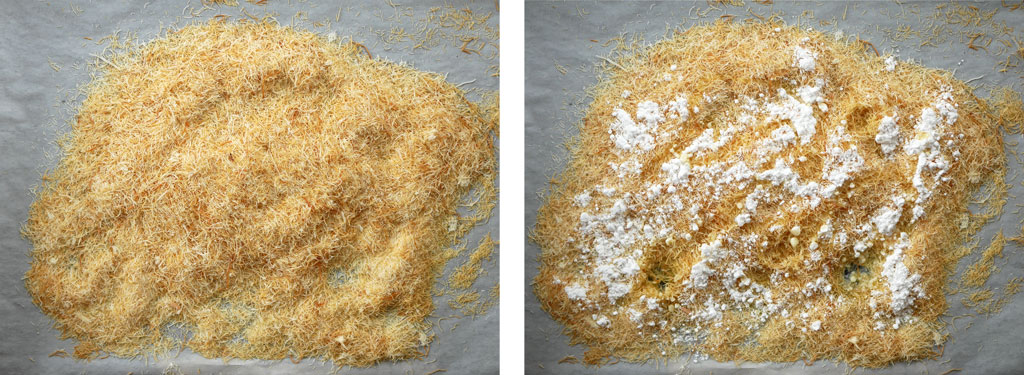
Put the tray in the oven and roast for about 10 minutes until slightly golden. Mix the kadaif intermittently during the roasting process using a large wooden spatula.
Remove from the oven. Sprinkle powdered sugar on top of the kadaif. Melt butter and add it as well. With clean hands, mix together until all the kadaif noodles are well greased.
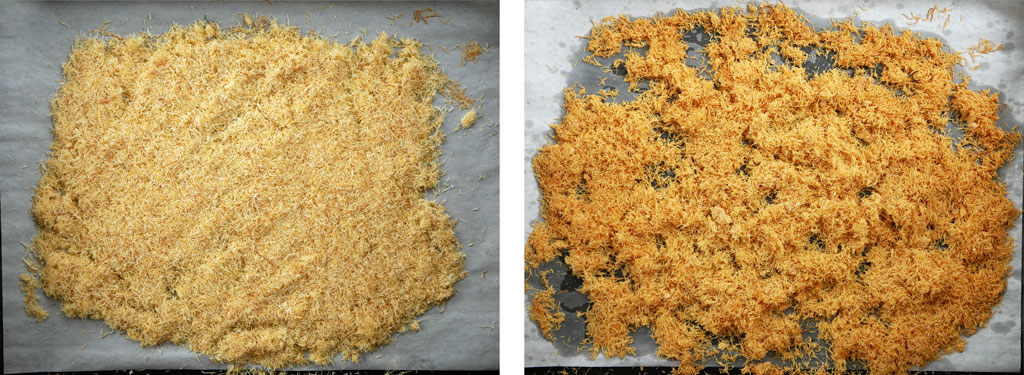
Put back in the oven and bake for about 10 minutes more, while mixing intermittently, until golden. Let cool at room temperature before use. Weigh the amount needed for the pistachio crunch and keep the rest in an airtight container for the decoration part.
Pistachio streusel
Preheat oven to 170 °C (340 °F). In a food processor, grind pistachios and flour together to a powder. Add sugar, butter and salt. Grind in short pulses until you get a crumble.
Spread the crumbly mixture on a baking tray lined with parchment paper. Place in the oven and bake for 8-10 minutes until golden brown. Remove from the oven and let it cool at room temperature. Weigh the amount needed for the pistachio crunch.
Pistachio kadaif crunch
Put pistachio butter, roasted kadaif and pistachio streusel in a bowl. Melt white chocolate (on a double boiler or in a microwave). Add the melted chocolate to the mixture and mix until uniform. The texture should resemble a crunchy spread. If the mixture is not spreadable, add a little bit more melted chocolate (5-10 g).
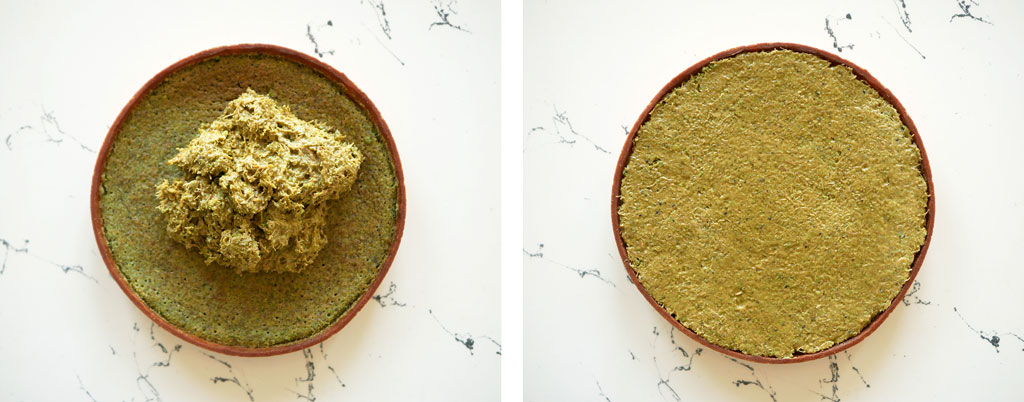
Using an offset spatula, spread the crunch on top of the tart and flatten the surface to be levelled with the rim of the crust. Set aside.

Decoration
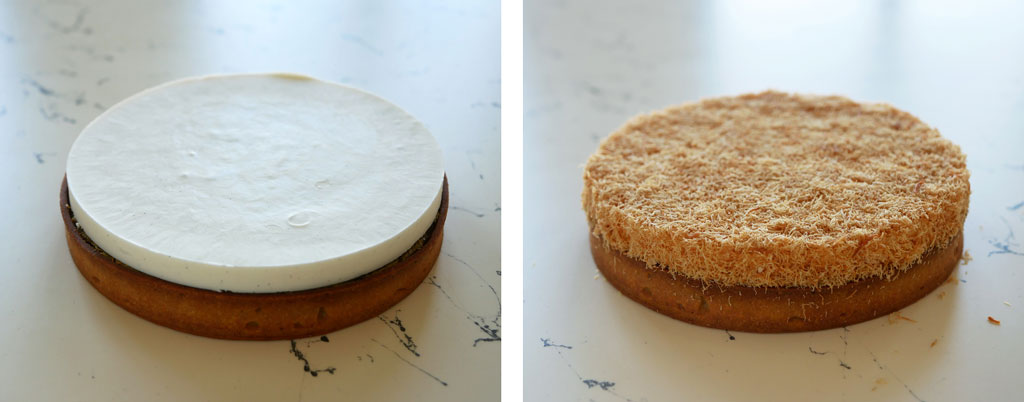
Remove the cream cheese mousse from the freezer and release it from the ring by warming the outer side of the ring with the warmth of your hands. Do it on top of the tart. The mousse will just slide out by itself and land on top of the tart.
Wait a little bit until the mousse thaws a little and creates a thin shiny layer around it that will allow the roasted kadaif noodles to adhere to it. Decorate the mousse with kadaif, on top and all around it (gently press the kadaif with your hand). Coarsely chop pistachios and sprinkle on top of the kadaif layer.
Keep the knafeh tart in the fridge for about 2-3 days in an airtight container. Please note, though the tart stays crunchy, the roasted kadaif noodles (that decorate the cheese mousse) lose their crunchiness after a day. So, you better decorate the tart with the kadaif on the day you serve the tart.


Leave a reply:

![]()
Get updates by email
![]()


