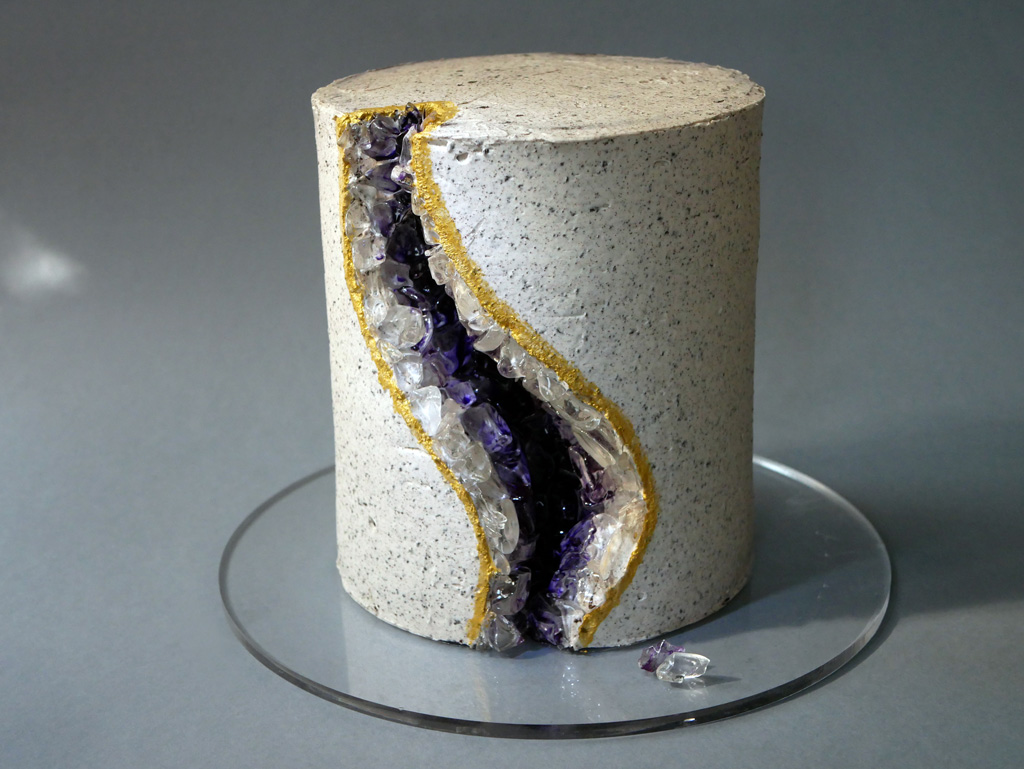
Geode Cake


I haven’t uploaded a blog post for more than a month now, because I tried to be dairy free for a while and the only result of that experiment was a decrease in my baking desire. The damned experiment ended last week on my birthday with a very dairy tiramisu cake. To go back to normal, I made a geode cake for little Eliora and Archie who came to visit from the States.
It wasn’t the first time I made them a delicious surprise. Many years ago on a previous visit, I made Robin, their dear mother, a chocolate cake disguised as a deep-dish pizza, Chicago style, as her partner Jeffrey requested for her birthday.
I must thank them. Each time I discovered something new that excited me. The first time I found out how fun it is to burn fondant (to create the burned texture of the pizza of course, not because of my developing pyromania).
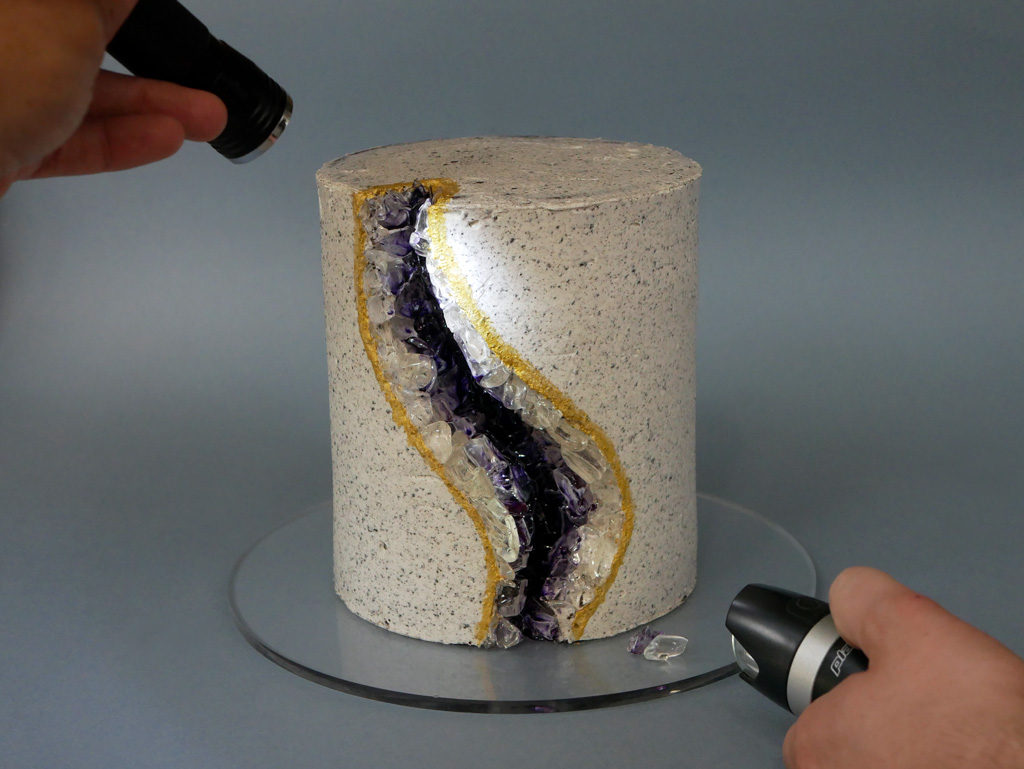
The second time I was exposed to the serenity of making a geode cake. Geode is a phenomena in which a cut through a certain stone reveals shiny glimmering crystals.
To create the effect, I used simple mint candy I bought from the market. I crushed the candy into pieces and then attached them inside the cut in the cake, piece by piece, with tweezers and a lot of patience. Did someone say occupational therapy?
In addition, I found a great opportunity to fix the recipe of the previous cake’s Oreo cream. I reincorporated mascarpone (instead of white chocolate) back into the recipe and reduced the Oreo cookies that may have also acted as a second culprit. Now the cream is perfect. Not only that, but it gives it a nice granite look to the cake and creates a better geode effect.
A few notes
- You may prepare the cake layers in advance and freeze them (up to a month!). Thaw the layers in the fridge overnight before assembling.
- If after baking and cutting, the layers are not straight, no biggy. The cream will fix everything later on.
- Decorating a geode cake takes a lot of patience. The cream must harden in the fridge a few times during the process. I suggest taking an evening for baking and a whole day for assembling and decorating.


Ingredients
Chocolate Cake
450 g flour
130 g cocoa powder
3 tsp baking powder
2 tsp baking soda
550 g sugar
1½ tsp salt
4 medium eggs (160 g)
160 g canola oil
2 tsp vanilla extract
360 g milk
320 g boiling water
1½ tsp instant coffee
Oreo Swiss meringue buttercream
6 egg whites (L)
1½ cup sugar
340 g soft butter at room temperature
330 g mascarpone at room temperature
8 Oreo cookies (about 88 g)
A pinch of salt
Decoration
50 clear mint candy (about 330 g)
Gel based food coloring (purple)
Edible gold dust
Alcohol (like Vodka)
Equipment
2 baking pans, 15 cm diameter and 10 cm height *
Large cake scraper
Small spreading spatula
Thermometer
Small brush
Pestle or hammer
Tweezers
Lazy Suzan (optional)
* If there’s only one cake pan, divide the chocolate cake recipe in half and bake twice.
The recipe makes 1 geode cake, 15 cm wide and 20 cm tall
Chocolate Cake
Lightly grease pans with oil. Line pans with parchment paper by cutting two circles, 15 cm in diameter each for the bottom, and a rectangle to fit the sides of the pans.
Sift flour, cocoa powder, baking powder and baking soda into a bowl. Add sugar and salt. Mix until uniform. Set aside.
Preheat oven to 175º C (350º F). Whip the eggs on medium speed until you get a foamy texture. Add canola oil and vanilla extract and mix until uniform. Bring water to a boil.
Add a third of the powder mixture to the egg batter and mix until uniform. Please note (!) Once the flour is combined in the batter, do not over mix. Add half of the milk and mix again. Add another third of the powders and mix. Add the rest of the milk and mix. Finally, add the rest of the powders and mix until the batter is uniform.
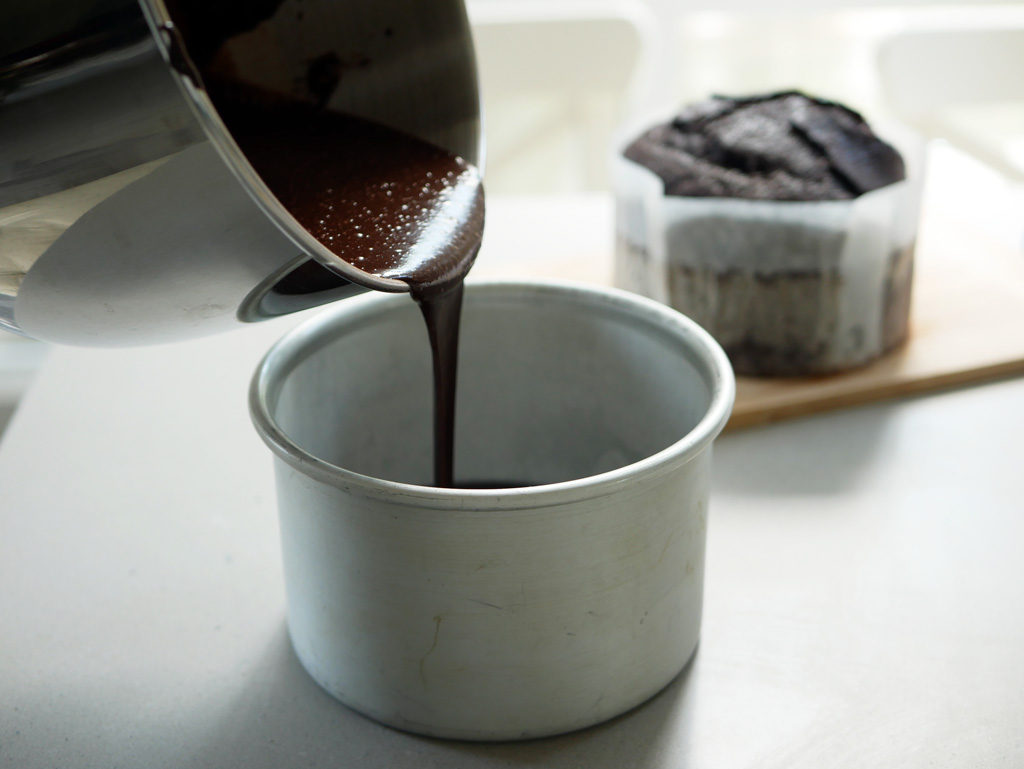
Add instant coffee to the boiling water. Mix well and add carefully to the batter. Mix again until uniform. Pour the batter evenly into both pans. If possible, wrap a strip of a damp towel around the baking pan to get a more uniform bake.
…
Put the two pans in the preheated oven and bake for 55-60 minutes. Stick a skewer in the center of the cake to check if it’s ready. The toothpick should come out almost dry, with just a bit of crumbs.
Remove pans from the oven and keep the cakes at room temperature for about 10 minutes before releasing from the pans. Let the cakes cool completely at room temperature and then keep in the fridge until ready to cut. (The cakes can be kept in the fridge for about a week or in the freezer for about a month)
Cut each cake into 2 layers, each layer about 4 cm high, with a large serrated knife or a saw. To get a straight clean cut, keep turning the cake and cut first from the sides then slowly advance to the center of the cake. Remove the parchment paper from the bottom of the cakes. Cover each layer in plastic wrap. Keep in the fridge until use.
Oreo swiss meringue buttercream
Put egg whites and sugar in a steel bowl. Set on a double boiler and heat on medium heat while whisking all along. When the mixture’s temperature reaches 70 ºC (160 ºF), lower the flame (or even turn it off) and continue whisking for a one more minute. This way the eggs get pasteurized. Remove from heat and allow it to cool at room temperature.
In the meantime, put soft butter in a bowl and whip (using a hand mixer or a stand mixer) for about half a minute. Add mascarpone gradually and continue to whip until the texture is smooth and fluffy, about 5 minutes. If some liquid forms in the bowl when adding the mascarpone, just get rid of it and continue to whip (This could be avoided if the ingredients have the same temperature).
When the temperature of the egg white mixture reaches 40 ºC (105 ºF), strain it directly into the bowl of the butter and mascarpone. Whisk everything together until you get a smooth and silky cream (About 5 minutes). Add a pinch of salt. In a food processor, grind the Oreo cookies into small crumbs. Add the Oreo crumbs to the buttercream and fold until uniform.
Putting it together!
There are two ways to cover the cake with the buttercream. The first is relatively simple and the second is slightly more complex but more accurate. For this cake I used the second method which requires 2 round Perspex boards with a 16 cm diameter. In this method, the cake is assembled with a board on top and on bottom, and then covered in cream. The boards give you more control over the buttercream cover and produce a nice straight cake without too much effort. Since not everybody has these boards, I’ll explain how to cover the cake using the simpler method, without the boards.
Spread a little bit of buttercream in the center of a serving plate, (flat with no corners). This is optional, but I advise you to place the serving plate on a Lazy Suzan to make the frosting process easier later on. Place one of the cake layers on top of the serving plate. Spread a layer of buttercream over the cake (about 1 cm thick please). Flatten the surface with a spatula.
Repeat the process for the other layers:
Place the second cake layer over the first one. Spread another generous layer of buttercream on top. Place the third cake layer over the second one. Spread another layer of buttercream on top. Place the fourth (and final) cake layer over the third one. Spread a very thin layer of buttercream on top.
Spread buttercream generously around the sides of the cake. Use a large cake scraper to remove all the excess buttercream. To do so, press the scraper on the side of the cake while turning the cake around, leaving it with a smooth layer of buttercream around the cake. (If there are dents, fill them with buttercream and smooth them again with the scraper). Smooth the top edges as much as possible. Keep in the fridge for about an hour or two until the buttercream has set. Cover the rest of the buttercream with plastic wrap and keep at room temperature.
Decorating the cake
While the cake is chilling in the fridge, prepare the candy. Using a pestle (or even a hammer) crush the candy into pieces. (Be careful, small pieces might fly all over the place while doing so). Keep aside.
Using a small sharp knife mark a random “geode” shape on the side of the cake. (You can go crazy and create as many cuts as desired). Using a small serrated knife cut the cake carefully (preferably in stages) following the mark. This will create a recess in the cake.
Using a small offset spatula, gently spread Oreo cream in the recess. Flatten to a uniform surface. Using tweezers, place pieces of candy on top of the cream in the recess. Start with big pieces from the center out and then add smaller pieces in the gaps between the big pieces. Keep in the fridge again for about an hour or two until the cream hardens.
Prepare the purple color:
In a small cup mix a few drops of alcohol with a few drops of purple food coloring. Using a brush, paint an extra candy to check if the color is dark enough. If not, add a few more drops of food coloring and mix.
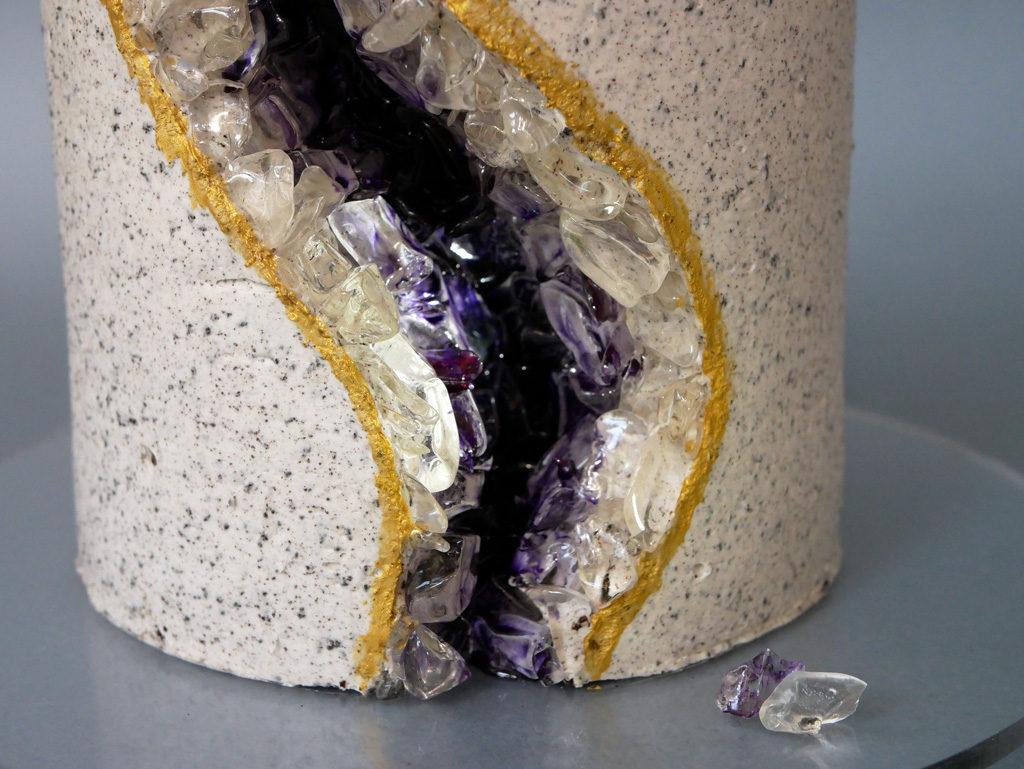
Remove the cake from the fridge. Paint the candy pieces in the center of the recess deep purple. Pour a bit of alcohol into a small clean cup and mix the brush in it. It will immediately dilute the color.
Paint the candy pieces that are around the center of the recess light purple (almost see through). Leave the rest of the candy pieces on the edge of the recess as is. Keep in the fridge again for about an hour or two until the cream hardens.
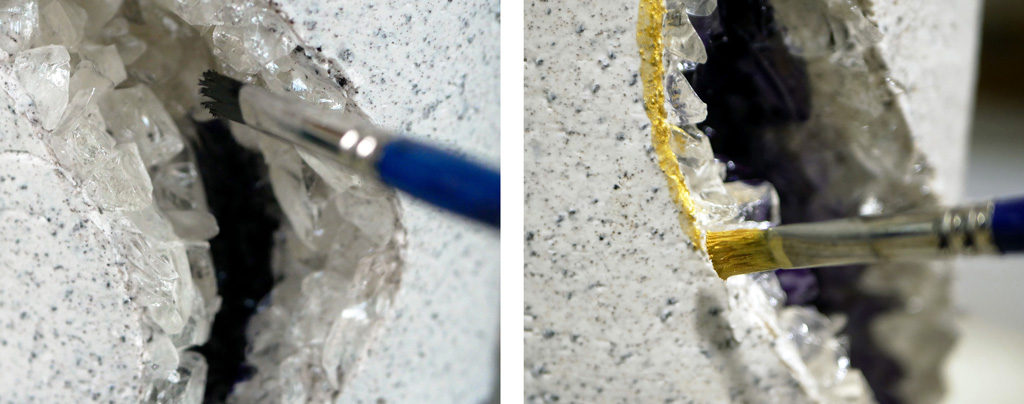
Prepare the gold color:
In a small cup mix a bit of gold dust powder with a few drops of alcohol. Using a brush, paint a golden strip around the opening of the recess. That’s it! Your geode cake is ready!
Keep the geode cake on a tall shelf in the fridge up to a week. Before slicing and serving, let the cake sit for about an hour or two at room temperature to soften the buttercream.


Leave a reply:

![]()
Get updates by email
![]()


